
At the end of this guide, you will be able to learn how to verify your website on Google.
This days Google will require you to verify your true ownership of some things before it gives you access to continue in what ever you want to do on Google. I think this is for security reasons.
Who is this guide for?
Anyone who is looking for ways on how to verify his or her website on Google.
I will be explaining in details with images on how to get this done.
I hope you enjoy the content and it gives you the solution on how to verify your website presence on Google. I will love to hear your questions, feedback, and success story. Please do leave your comment behind also feel free to share.
To verify or clam the ownership of your website to Google you will need to copy some code from Google and paste it on your website.
Some Google method of verifications are:
- Html tag
- Domain name Provider
- Google analytics
- Google Tag Manager
On this guide I will be using “Html tag” method and a plugins called “yoast SEO” to archive this result.
If you need help on some other method of verification you can send a message, on this email: feedback@bestinfotechservices.com
Note: am doing this on WordPress website, the most popularly used Content Management Software. (CMS) for web design.
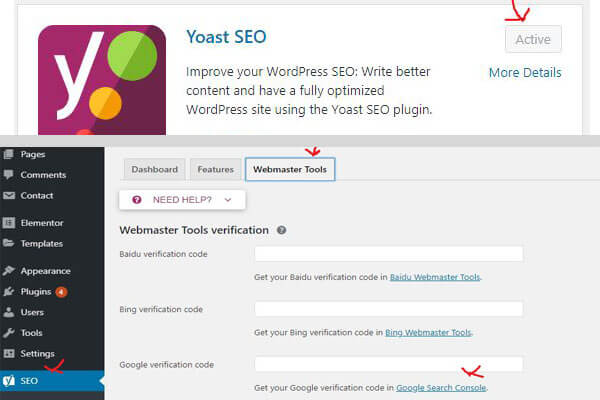
Now “login to WordPress website” on the left down side of yourdashboard look for “ plugins “ and click on “add new “ on the search bar type “Yoast” you will see a “Yoast SEO” plugin, click “install” after that you click “activate”. It will take you to the list of all the plugins installed on your WordPress.
If you have installed it already; skip the installation process and proceed to the next instruction.
Then scroll down looking at the left side of the dashboard hover to “Yoast icon” click on “general” and click on the “webmaster tools”, and scroll down a little, Click the link “Google search console” under Google verification code.
See the image below for guide.
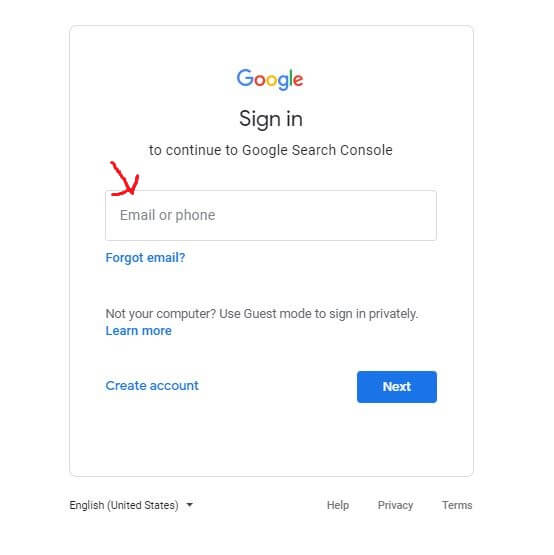
It will take you to Google sign in page that will require you to login; that if, you are not already login to the browser but if you have already login, it will take you to a page called Webmaster Central.
If you have not yet signed in; you will need to enter the actual “email account and password” you would want to use for verification. Is advisable you create a separate Gmail account for your business.
After a successful login.
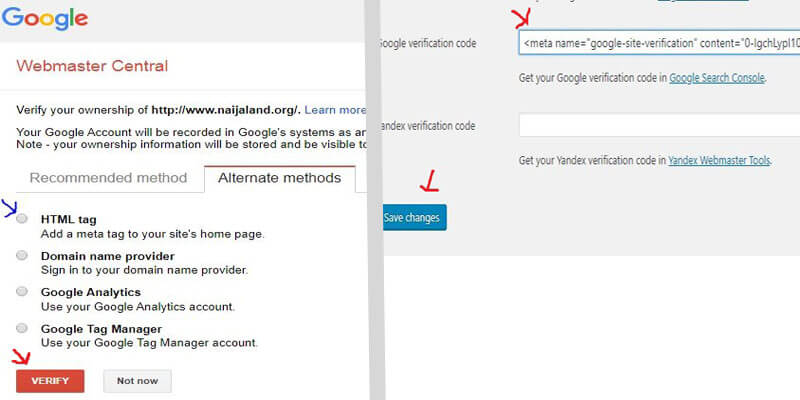
Click on the “radio button at HTML tag” this will display a “Google code”. Copy it and go back to your WordPress Yoast plugins and paste it. Thereafter click on “save changes”.
Now go back to Google webmaster central and click on “verify” button.
See the two images below for guide.
By now you should be able to see successful verification screen that look like the one below.
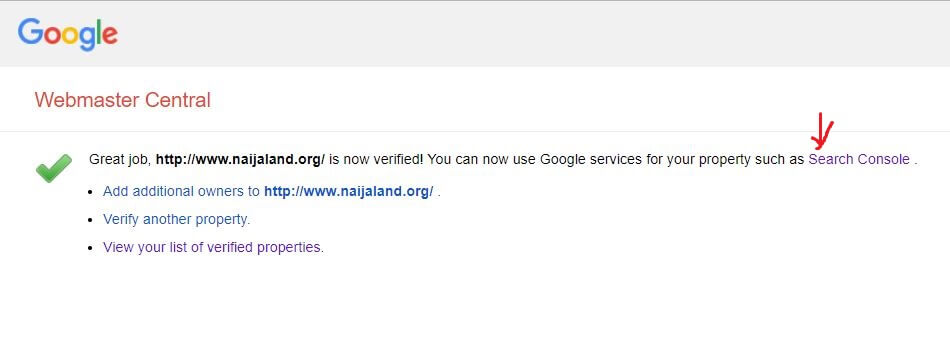
Happy Happy Happy… you have successfully verified the ownership of the website.
view “2019, How to know if Google has indexed your website and how to fix it“
Written by

