At the end of this guide, you will be able to learn how to index your new or existing website on Google search (i.e. making your website URL appear on Search Engine).
Who is this guide for?
Anyone who is looking for a solution on how to index his or her website URL on Google Search.
I hope you enjoy the content and it gives you the solution on how to improve your website presence on Search Engine. I will love to hear your questions, feedback, and success story. Please do leave your comment behind.
Feel free to save and share the guide.
Please note: by default Google robots always crawl to millions of websites to get the desired result. But if for some reason, your new or existing website was not found by Googlebot. Like it happened on one of the domains am managing.
Here are some of the steps I followed to get the website URL display on Google Search.
Step1. Verify the ownership of the website on Google.
Step2. Submitting your website sitemap to Google search console.
In this example, I will be using one of the websites I design that was not found on Google Search.
Website name: naijaland
URL: www.naijaland.org
Below is a result of the Google search result of one of my websites after applying these 2 steps mentioned above.


Now let’s get started
How to check if Google has indexed your new or existing website.
Go to “Google Search” and type your website “name or URL” to know if Google has automatically discovered your website.
On the image shown above you will notice that previously Google didn’t index my website URL: “naijaland.org” but after applying these steps am about to show you, my website is finally shown on the Google search result.
How to Fix the Problem.
Please make sure that your website is properly named and described, this will help Googlebot to easily understand your website.
Step1. You will need to verify or claim the ownership of the website to Google by copying some code from Google and pasting it on the website.
Some Google method of verifications are:
- Html tag
- Domain name Provider
- Google analytics
- Google Tag Manager
In this guide, I will be using the “Html tag” method and a plugin called “Yoast SEO” to archive this result.
Note: am doing this on a WordPress website, the most popularly used Content Management Software. (CMS) for web design.
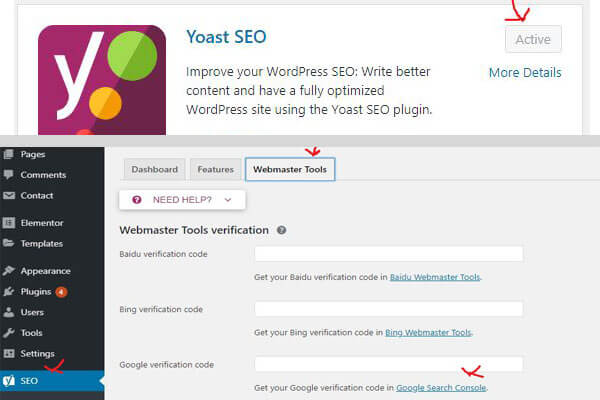
Now “login to WordPress website” on the left downside of your dashboard look for “ plugins “ and click on “add new “ on the search bar type “Yoast” you will see a “Yoast SEO” plugin, click “install” after that you click “activate”. It will take you to the list of all the plugins installed on your WordPress.
If you have installed it already; skip the installation process and proceed to the next instruction.
Then scroll down looking at the left side of the dashboard hover to “Yoast icon” click on “general” and click on the “webmaster tools”, and scroll down a little, Click the link “Google search console” under Google verification code.
See the image below for a guide.


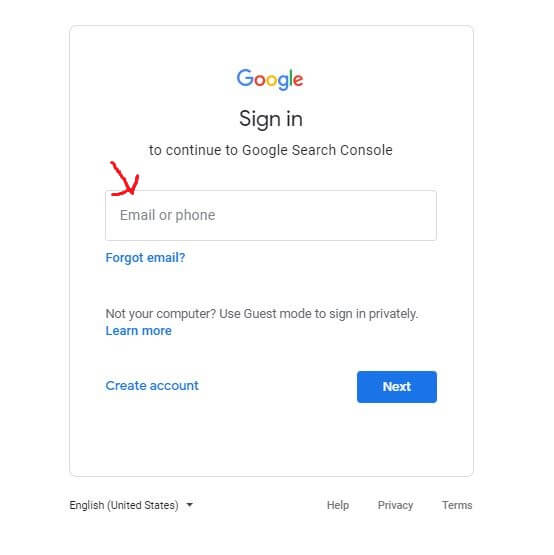
It will take you to Google sign-in page that will require you to login; that if, you are not already login to the browser but if you have already login, it will take you to a page called Webmaster Central.
If you have not yet signed in; you will need to enter the actual “email account and password” you would want to use for verification. Is advisable you create a separate Gmail account for your business.


After successful login.
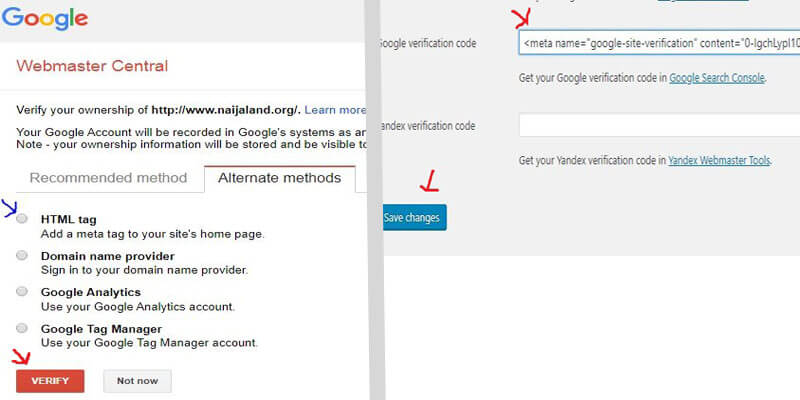
Click on the “radio button at HTML tag” this will display a “Google code”. Copy it and go back to your WordPress Yoast plugins and pest it. Thereafter click on “save changes”.
Now go back to Google webmaster central and click on the “verify” button. See the two images below for a guide.


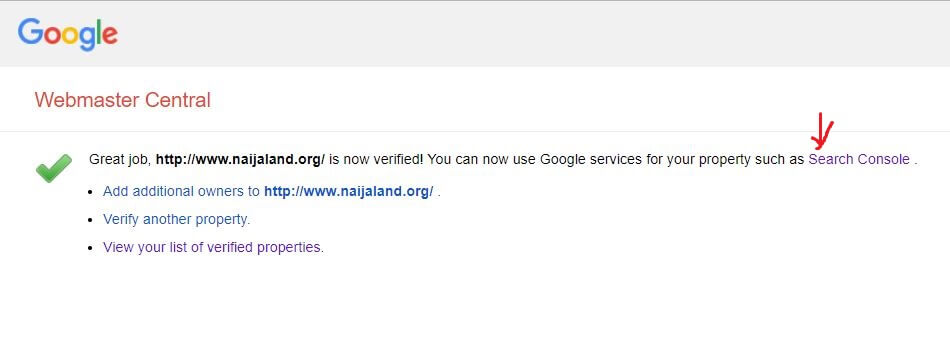
By now you should be able to see a successful verification screen that looks like the one below.


Happy Happy Happy… you have successfully verified the ownership of the website.
If you go back to Google search and type… in the website, you will notice that Google has not still discovered your website at this point, because you have only clam the ownership of the website.
What next?
Time to go to the 2nd step
Step2. Submitting your website sitemap to Google search console.
Now on that same Google webmaster, central page click the link “Search Console”. See the above image for a guide
It will take you to a Google search console page like the one shown below. Click the “Start now” button.


You will be taken to the welcome page of Google Search Console, enter your website URL see the image below for a guide and click on the “Continue” button and wait for it to finish the verification process.
After the ownership verification is successful like the one shown below. Click on the “Go To Property” button.


Now your website URL has been added to your Google Search Console property you should be able to see the website URL at the top left side.
At this point, you will need to go to your Yoast plugin on the WordPress dashboard copy your XML sitemap and paste it.
Let’s go and get it done…
Go and click on the “Yoast icon” on your WordPress dashboard, click on the “features” menu.
Scroll down and locate the XML sitemap. Then click on the “question mark” by the side. This will display a link. Right-click and open in a new tap the link that says: “see the XML sitemap”.See the image below for a guide.
You will be taken to the XML Sitemap page of your website. Copy the XML page and post. Example: “page-sitemap.xml” and “post-sitemap.xml”.
Now navigate back to the Google search console page. Click on the “sitemaps” enter your “sitemap URL” you just copied and click on “submit”. See the image below for a guide.
Wait for it to finish the process of the data. By now you should be seen a screen like the one below click on “Go IT”

Bravo, you have done it…
Googlebot will now periodically check your website content. Wait after some days and type your website URL on Google search.
While waiting I will adverse for you to quickly set up your Google my business page.
Written by

